Skip to content

Cloudflare

4 posts with the tag “Cloudflare”

Cloudflare PagesでNode.jsのバージョンを変更したいとき

Cloudflare Pagesのビルド時にNode.jsのデフォルトバージョンが古くてエラーになることがありました。

Node.jsのバージョンを変更できたので、その方法を備忘録として残します。

デフォルトのNode.jsバージョン

Cloudflare Pagesのガイドによると、デフォルトでNode.js 10が使用されるとされています。ただし、実際のビルドログを確認すると、v12.18.0が使用されているケースもあるようです。これはプロジェクトの設定やランタイムによって異なる可能性があります。

Node.jsバージョンの変更方法

Node.jsのバージョンを変更するには、以下の2つの方法があります。

  1. Cloudflare Pagesの環境変数を使用
  2. ローカルファイルで環境変数を指定

どちらの方法でも、使用したいNode.jsのバージョンを指定することができます。

Cloudflare Pagesの環境変数を使用

  1. Cloudflareダッシュボードにログインします。
  2. 「Workers & Pages」を選択し、該当するPagesプロジェクトを開きます。
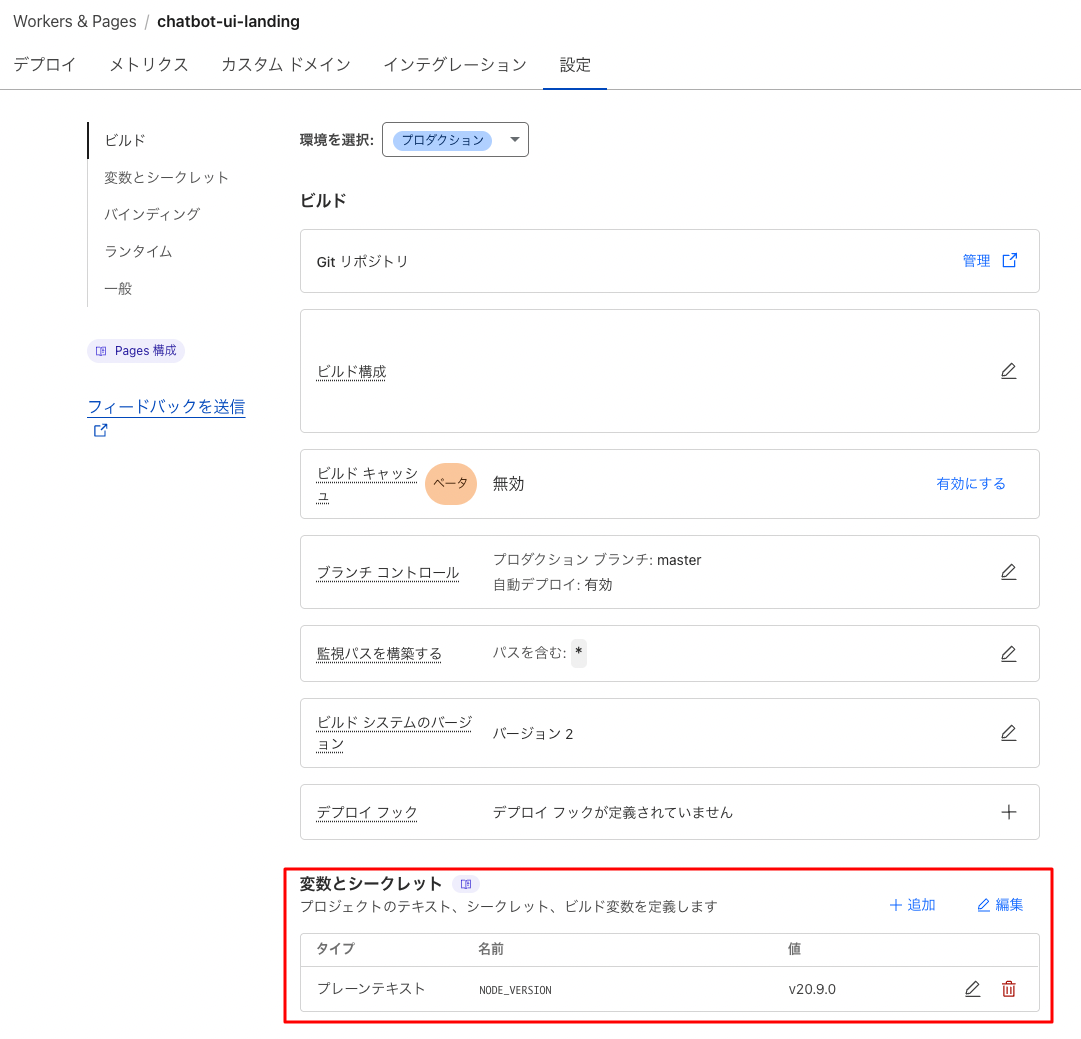
  3. 「設定」→「変数とシークレット」と進み、NODE_VERSIONという名前の変数を追加します。
  4. 値に希望するNode.jsのバージョン(例:20.9.0)を入力します。

Image from Gyazo

ローカルファイルで環境変数を指定

プロジェクトのルートディレクトリに.nvmrcまたは.node-versionファイルを作成し、使用したいNode.jsのバージョンを記述します。

.nvmrc または .node-version
20.9.0

Cloudflare PagesでNode.JS Compatibility Errorが出たとき

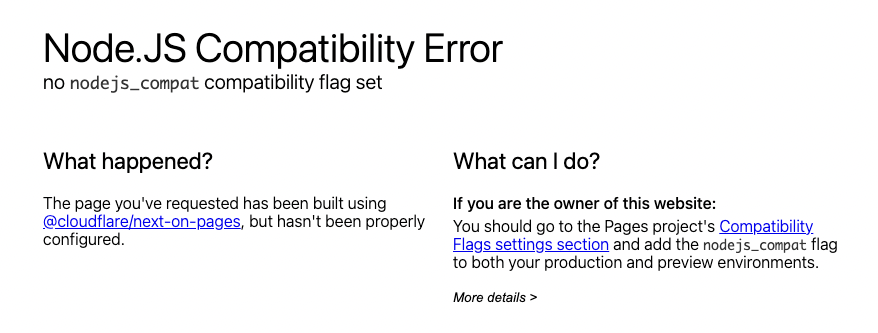
Cloudflare PagesでNext.jsプロジェクトをデプロイする際に、Node.JS Compatibility Errorに遭遇して解決したので備忘録。

Image from Gyazo

エラーの内容

デプロイ後、以下のようなエラーメッセージが表示されることがあります:

このエラーは、Cloudflare PagesプロジェクトでNode.jsの組み込みモジュールにアクセスできないことを示しています。

解決方法

Cloudflareダッシュボードから設定する方法

  1. Cloudflareダッシュボードにログインします。
  2. 「Workers & Pages」を選択し、該当するPagesプロジェクトを開きます。
  3. 「Settings」→「Functions」→「Compatibility Flags」と進みます。
  4. 「nodejs_compat」フラグを追加します。

注意: フラグは nodejs_compat とだけ入力します。引用符やその他の文字は不要です。

wrangler.tomlファイルで設定する方法

プロジェクトのルートディレクトリにある wrangler.toml ファイルに以下の行を追加します:

compatibility_flags = [ "nodejs_compat" ]

重要な注意点

  • Compatibility Flagsを設定した後は、変更を反映させるために再デプロイが必要です。
  • 設定方法によっては、ダッシュボードの「Functions」オプションが見つからない場合があります。その場合は wrangler.toml ファイルでの設定をお試しください。

まとめ

Cloudflare PagesでNode.js Compatibility Errorが発生した場合、nodejs_compat フラグを設定することで解決できます。ダッシュボードまたは wrangler.toml ファイルでこの設定を行い、再デプロイすることでエラーを解消できるはずです。

参考リンク

このエラーに遭遇した際は、ぜひこの方法をお試しください。デプロイの成功をお祈りしています!

Purchasing a Domain on Cloudflare and Registering it with Pages

I used to purchase domains from AWS, but as I’ve been deploying more often on Cloudflare, I decided to buy domains from Cloudflare as well.

I’m recording the purchase process as a reminder.

Purchasing a Domain on Cloudflare Pages

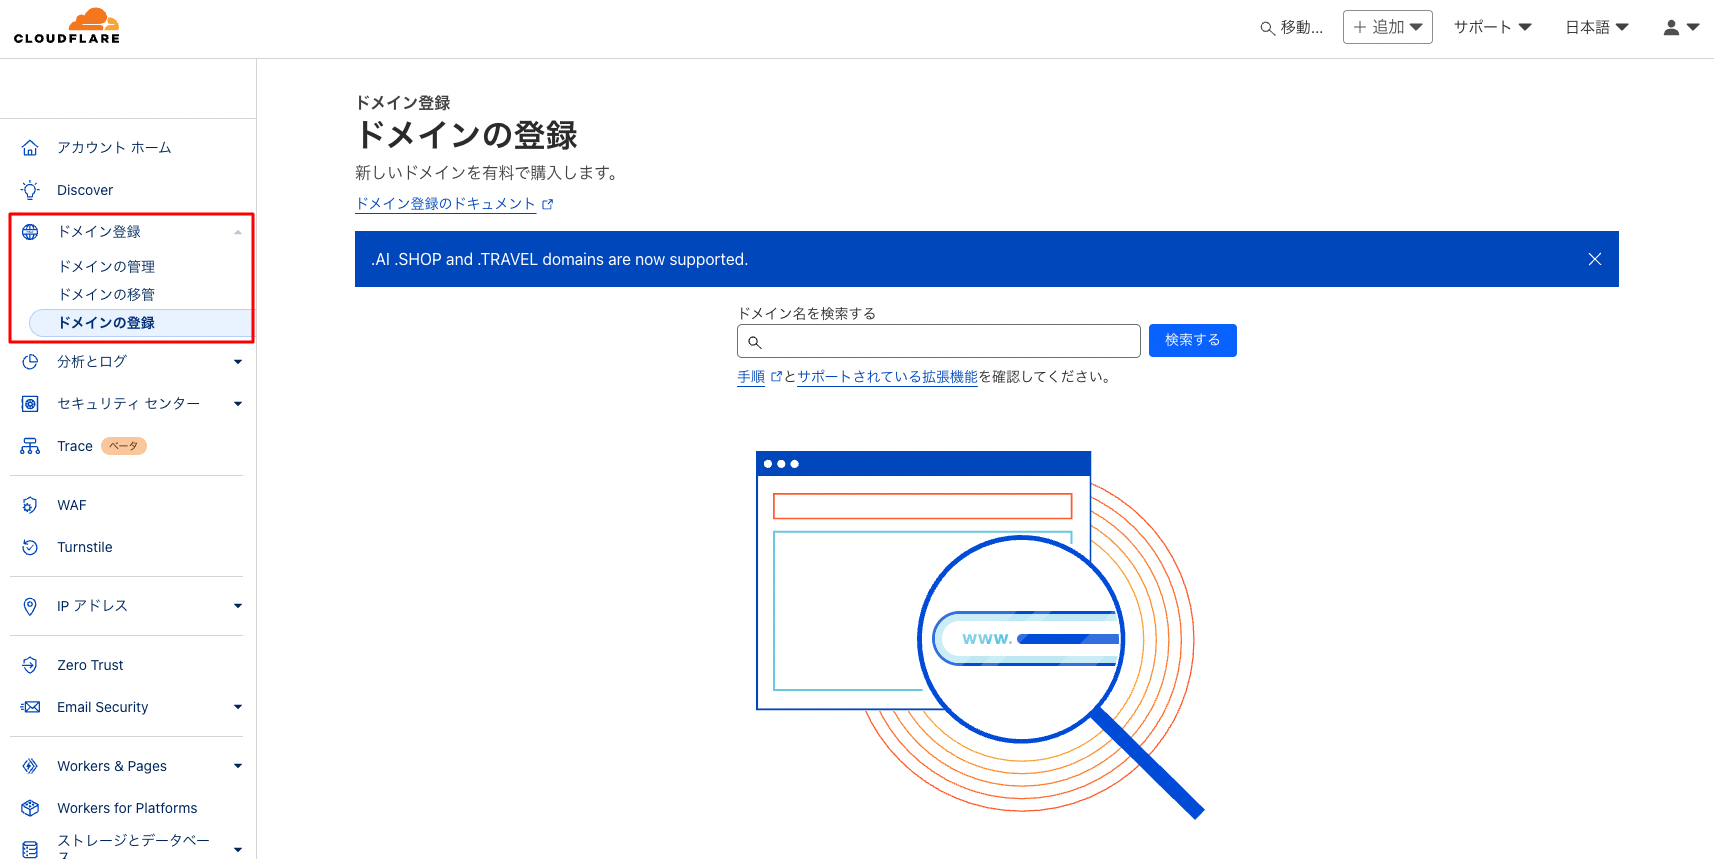
  1. From the left menu of the Cloudflare dashboard, select “Domain Registration”.

    Image from Gyazo

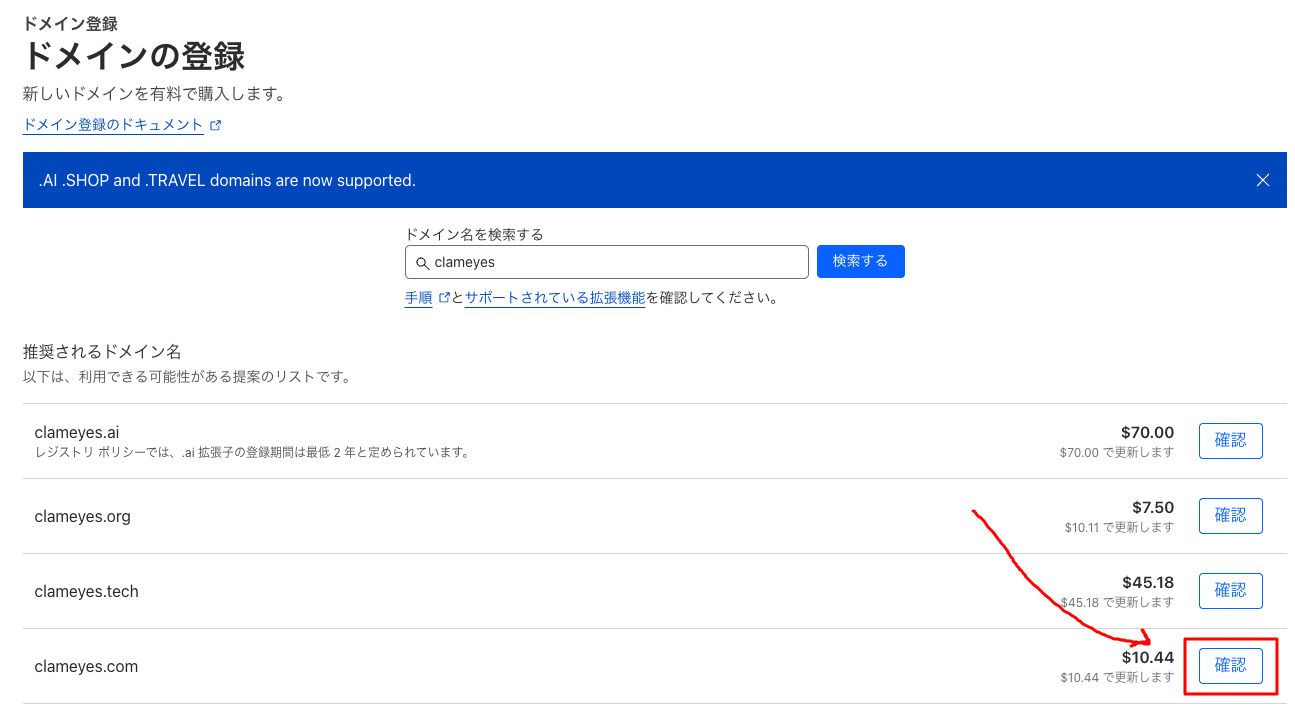
  2. Search for the domain you want to add and click the “Check” button.

    Image from Gyazo

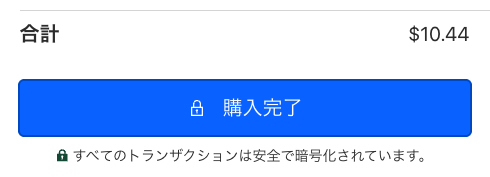
  3. You’ll be taken to a page to complete the registration. Enter your payment information and click the “Complete Purchase” button.

    Image from Gyazo

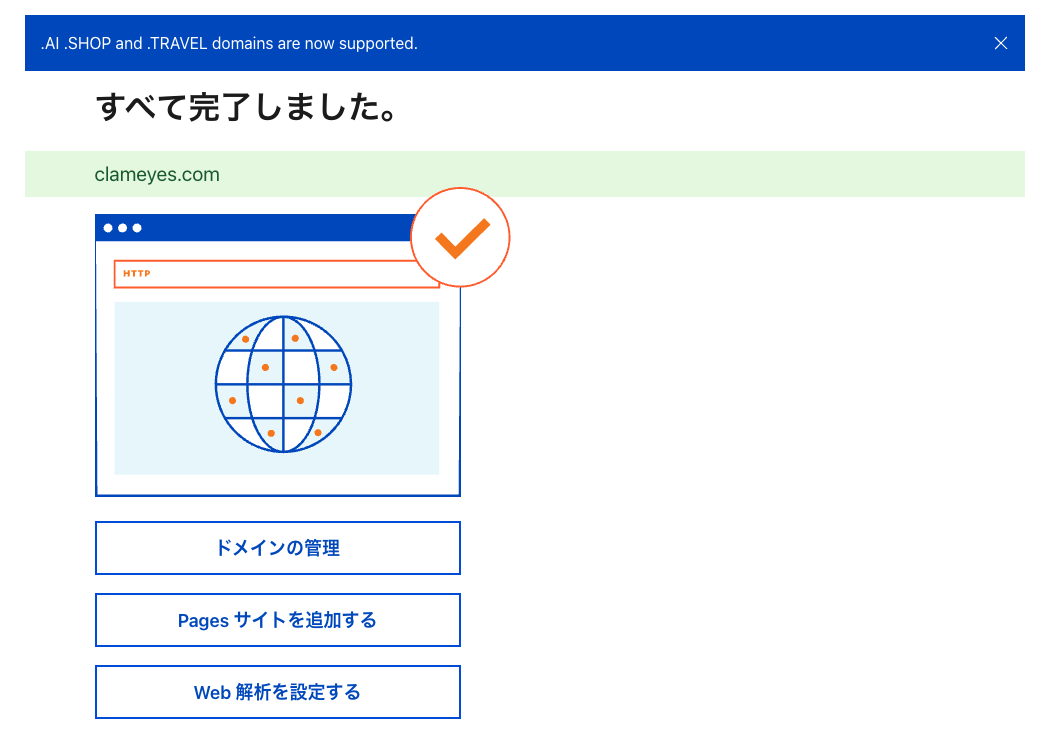
  4. When the purchase is complete, you’ll see a message like this:

    Image from Gyazo

If an Error Occurs

Here’s what to do if you encounter the following error when purchasing a domain:

The actual error will look like this:

We're sorry, but a problem occurred.

Upon investigation, it seems that Cloudflare payments may fail with Rakuten Card.

https://blog.stin.ink/articles/sitn-ink-from-google-to-cloudflare

There might be other possibilities, but it might be worth trying with a different credit card.

In my case, I was able to make the purchase after switching to different credit card.

Domain Configuration

After purchasing the domain, configure it for use with Pages.

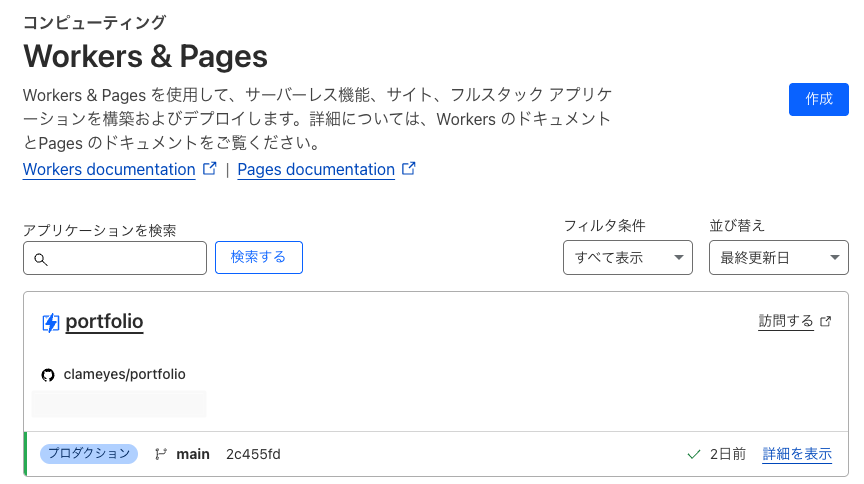
  1. From the Cloudflare dashboard, select “Workers & Pages” and choose the project where you want to use the purchased domain.

    Image from Gyazo

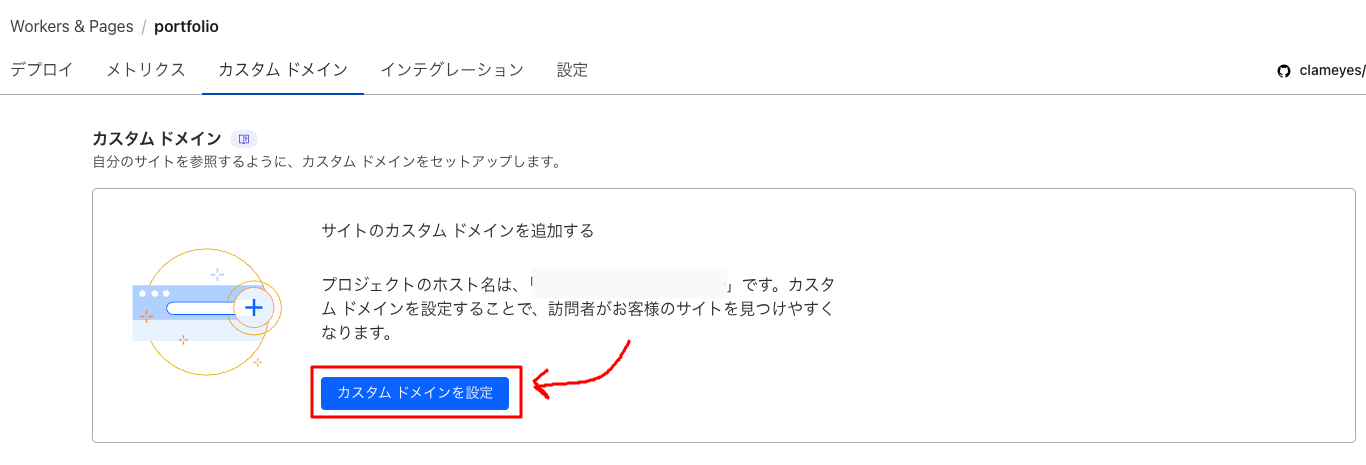
  2. Next, select the “Custom Domains” tab and click the “Set up a custom domain” button.

    Image from Gyazo

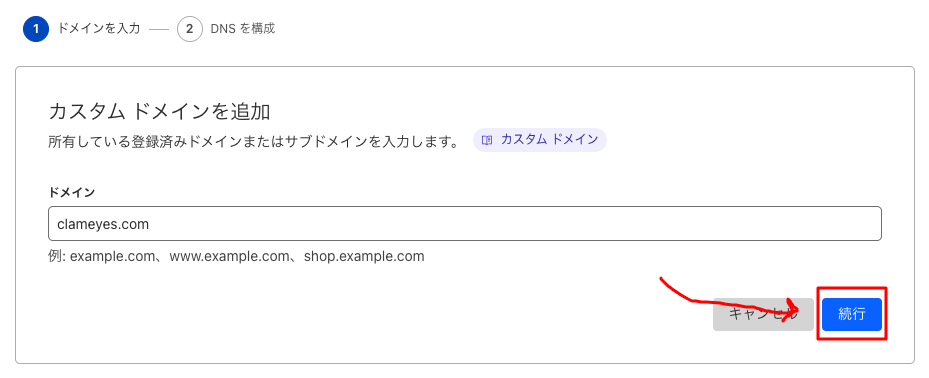
  3. Enter the domain name and click the “Continue” button.

    Image from Gyazo

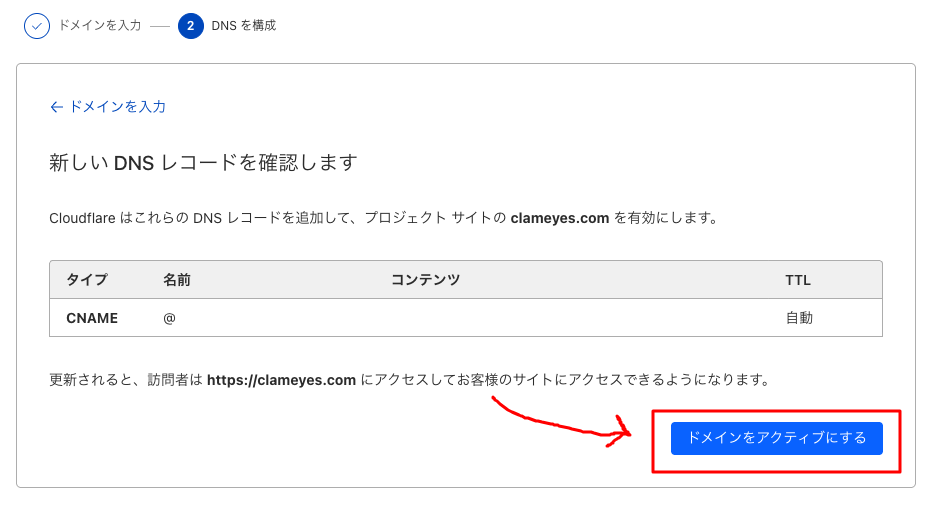
  4. Review the settings, and if everything looks good, click the “Activate Domain” button.

    Image from Gyazo

This completes the domain configuration.

It may take some time before it’s actually usable, so be patient. (Up to 48 hours)

Deploy Astro to Cloudflare Pages with Terraform (GitHub Integration)

I deployed an Astro project to Cloudflare Pages using Terraform (or OpenTofu) with GitHub integration, so I’m leaving this as a memo.

By using Terraform, you can manage infrastructure as code and automate the deployment process.

Prerequisites

  • Terraform (or OpenTofu) installed
  • Cloudflare account and access token
  • GitHub account and Astro project pushed to a repository

Also, assuming this is for personal development, we’ll use the following approach:

  • Add tf files directly to the Astro project’s git repository (monorepo)
  • Manage tfstate files locally only

Steps

Setting up the Terraform project

First, create the Terraform configuration files.

Terminal window
touch main.tf variables.tf

Creating the variables.tf file

Define the necessary variables in the variables.tf file.

variables.tf
variable "cloudflare_api_token" {
description = "Cloudflare API Token"
type = string
}
variable "cloudflare_account_id" {
description = "Cloudflare Account ID"
type = string
}
variable "production_branch" {
description = "Production branch name"
type = string
default = "main"
}
variable "github_repo_name" {
description = "Name of GitHub repository"
type = string
}
variable "github_owner" {
description = "Owner of GitHub repository"
type = string
}

Creating the main.tf file

Add the Cloudflare Pages project resource to the main.tf file.

main.tf
terraform {
required_providers {
cloudflare = {
source = "cloudflare/cloudflare"
version = "~> 3.0"
}
}
}
provider "cloudflare" {
api_token = var.cloudflare_api_token
}
resource "cloudflare_pages_project" "astro_project" {
account_id = var.cloudflare_account_id
name = var.github_repo_name
production_branch = var.production_branch
source {
type = "github"
config {
owner = var.github_owner
repo_name = var.github_repo_name
production_branch = "main"
pr_comments_enabled = true
deployments_enabled = true
production_deployment_enabled = true
}
}
build_config {
build_command = "npm run build"
destination_dir = "dist"
root_dir = "/"
}
deployment_configs {
preview {
environment_variables = {
NODE_VERSION = "20.9.0"
}
}
production {
environment_variables = {
NODE_VERSION = "20.9.0"
}
}
}
}
If using pnpm, change the `build_command` to `npm i -g pnpm && pnpm i && pnpm build`.

Creating the tfvars file (Optional)

Add your Cloudflare API Token and Account ID to the terraform.tfvars file.

By doing this, you won’t need to input variable values when running the terraform apply command.

terraform.tfvars
cloudflare_api_token = "Your Cloudflare API Token"
cloudflare_account_id = "Your Cloudflare Account ID"
github_repo_name = "Your Astro project repository name"
github_owner = "Owner of your Astro project repository"

The branch is set to main by default, but if you want to change it, add it to terraform.tfvars.

Setting up a custom domain (Optional)

To set up a custom domain, add the following resource to main.tf:

main.tf
resource "cloudflare_pages_domain" "custom_domain" {
account_id = var.cloudflare_account_id
project_name = cloudflare_pages_project.astro_project.name
domain = "your-custom-domain.com"
}

Initializing and applying Terraform

Run the following commands to initialize the Terraform project and create resources.

As Terraform is licensed under BSL1.1, you can also use OpenTofu as an open-source alternative.

Terminal window
terraform init
terraform apply -auto-approve

If prompted for variable values, enter the appropriate values. (Not necessary if you’ve created terraform.tfvars)

Confirming the deployment

After Terraform has been applied, you can check the newly created Pages project in your Cloudflare dashboard.

When changes are pushed to the GitHub repository, the build and deployment will start automatically.