Automatic Deployment to EC2 When Pushed to GitHub Actions
I tried the method of automatic deployment to EC2 using GitHub Actions with reference to the article below.
https://qiita.com/kaino5454/items/bae4bca47e6f409e072f
I made some changes, so here’s a record for future reference.
Prerequisites
- You have a GitHub account and remote repository
- A local repository is placed on the EC2 instance and can push to GitHub via SSH
- You have an AWS account
- You can SSH into the EC2 instance using a key pair
Adding Secrets for GitHub Actions
Open the repository page you want to apply automatic deployment to, and click the “Settings” tab in the upper right.
Then select “Secrets and variables” → “Actions” from the menu on the left.
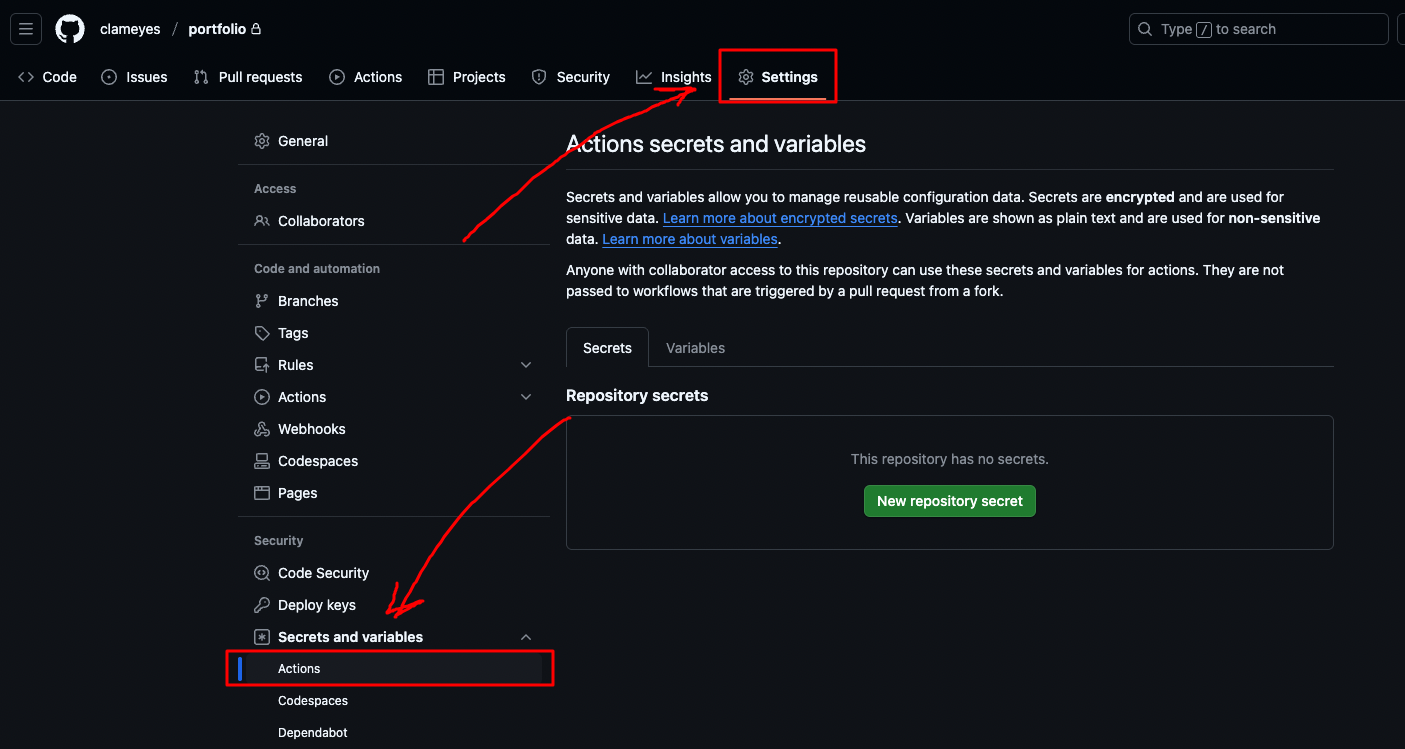
You can add secrets to be used in GitHub Actions by clicking the “New repository secret” button shown in the image above.
We will add each of the following Secrets one by one:
- AWS_ACCESS_KEY
- AWS_SECRET_ACCESS_KEY
- USER_HOST_NAME
- EC2_SECURITY_GROUP_ID
- PRIVATE_KEY
AWS_ACCESS_KEY and AWS_SECRET_ACCESS_KEY
First, create an AWS IAM role and add an access key and secret key.
-
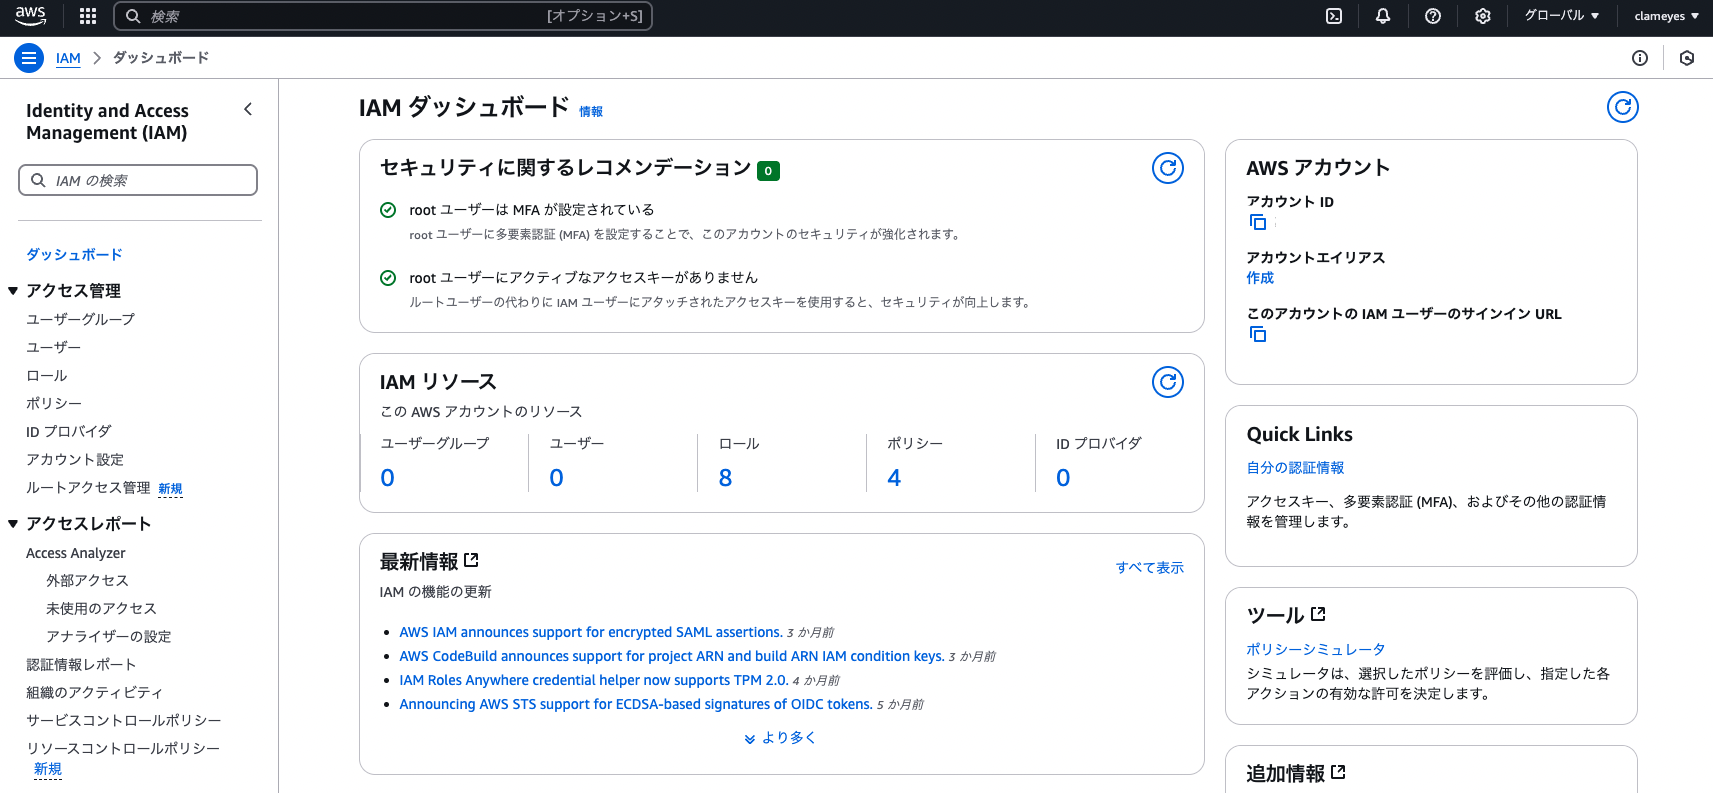
Log in to the AWS Management Console and open the IAM service
-
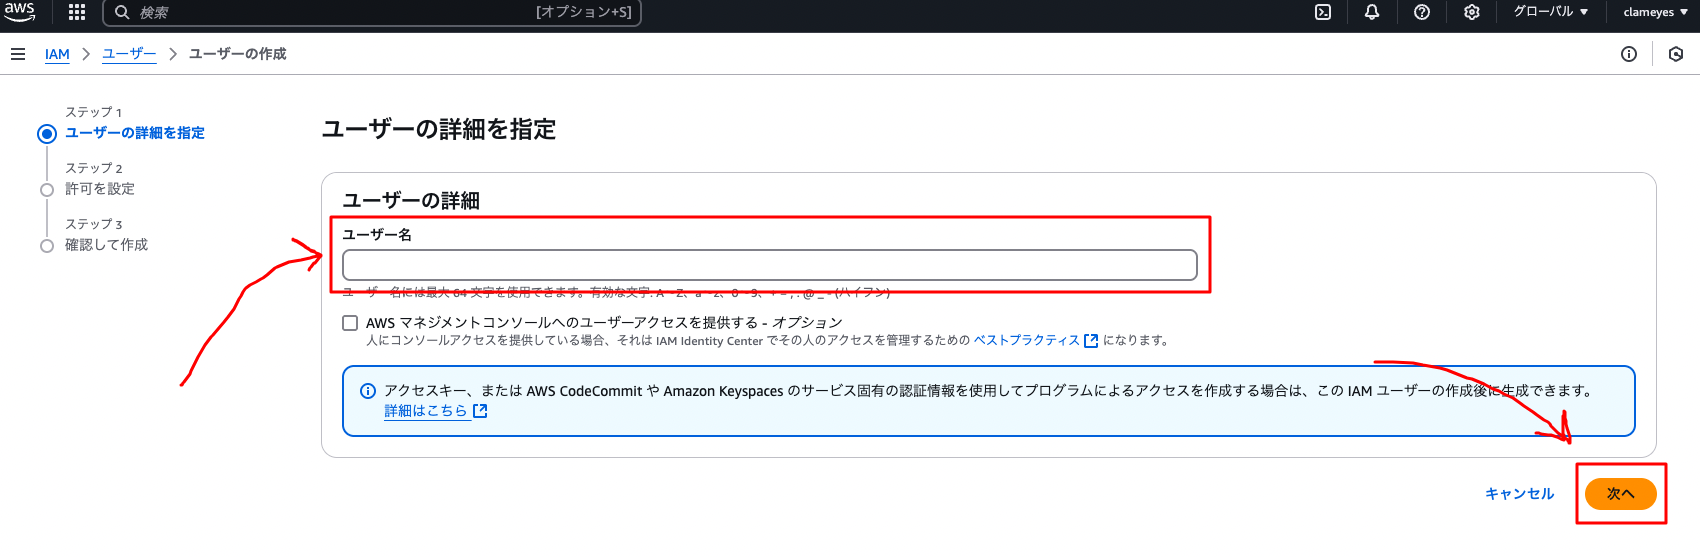
Select “Users” from the menu on the left and click the “Create user” button

-
Enter a username and select “Next”
-
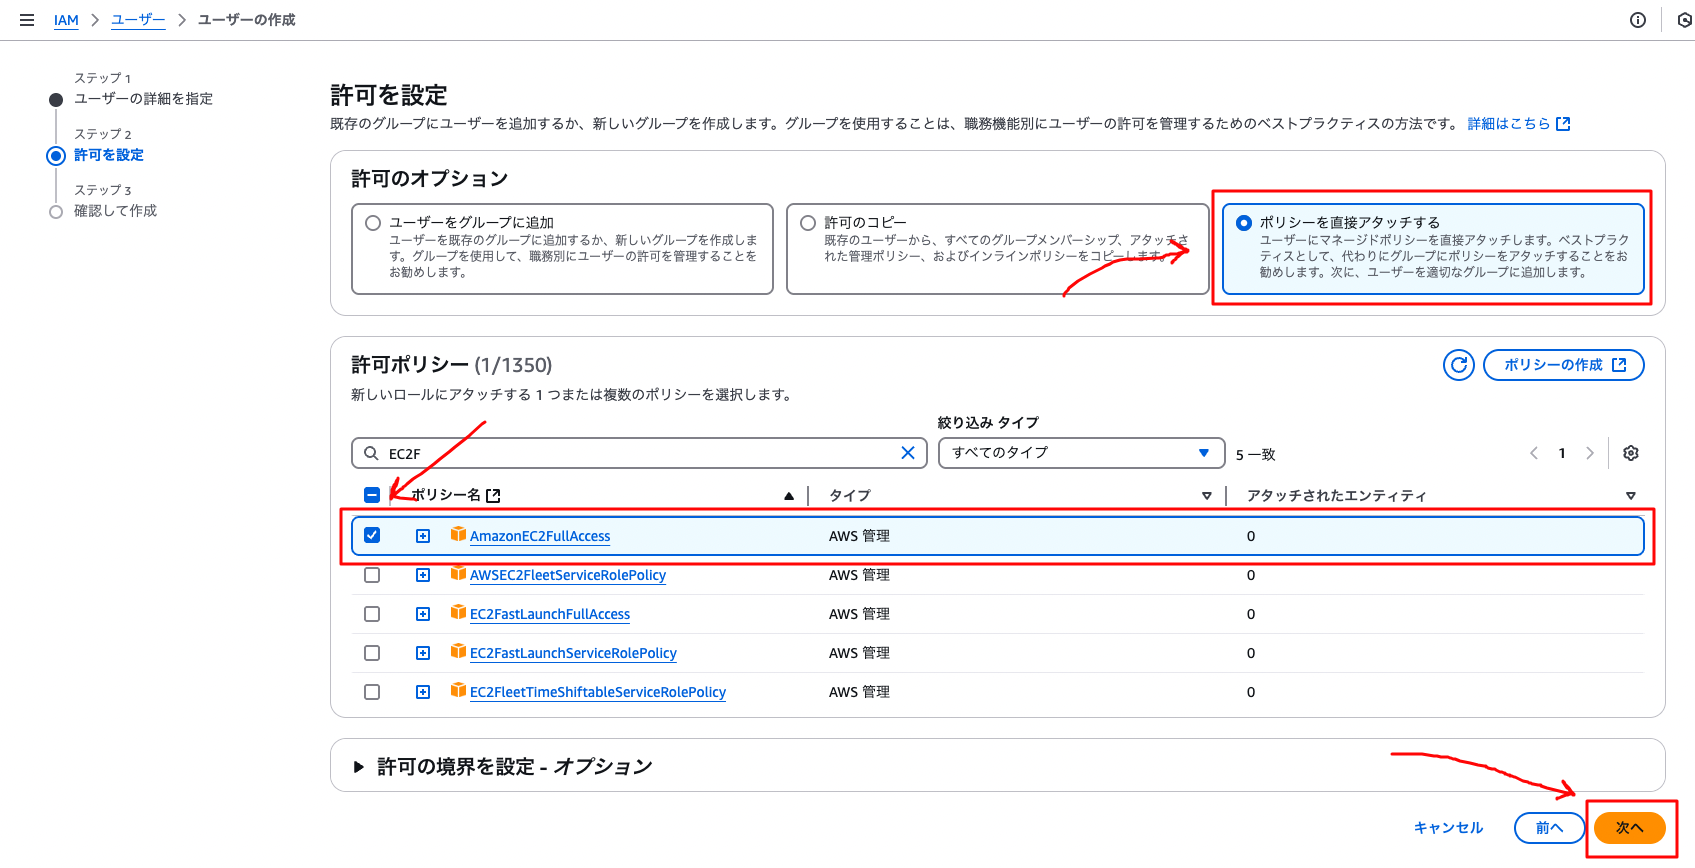
Check “Attach policies directly”, check “AmazonEC2FullAccess” for permission policies, and click “Next”
-
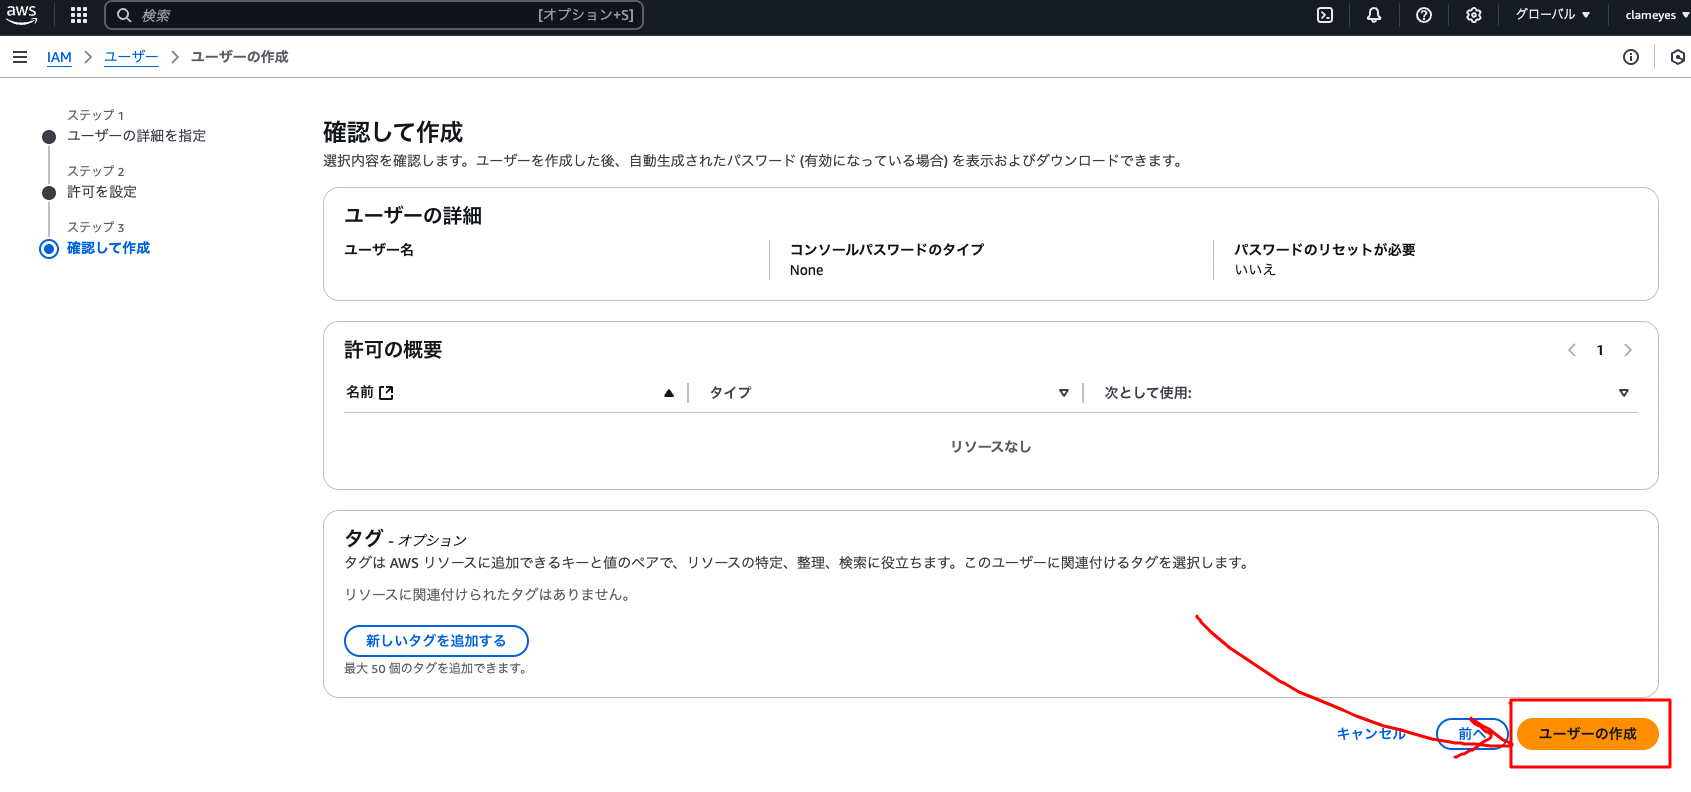
Click “Create user”
-
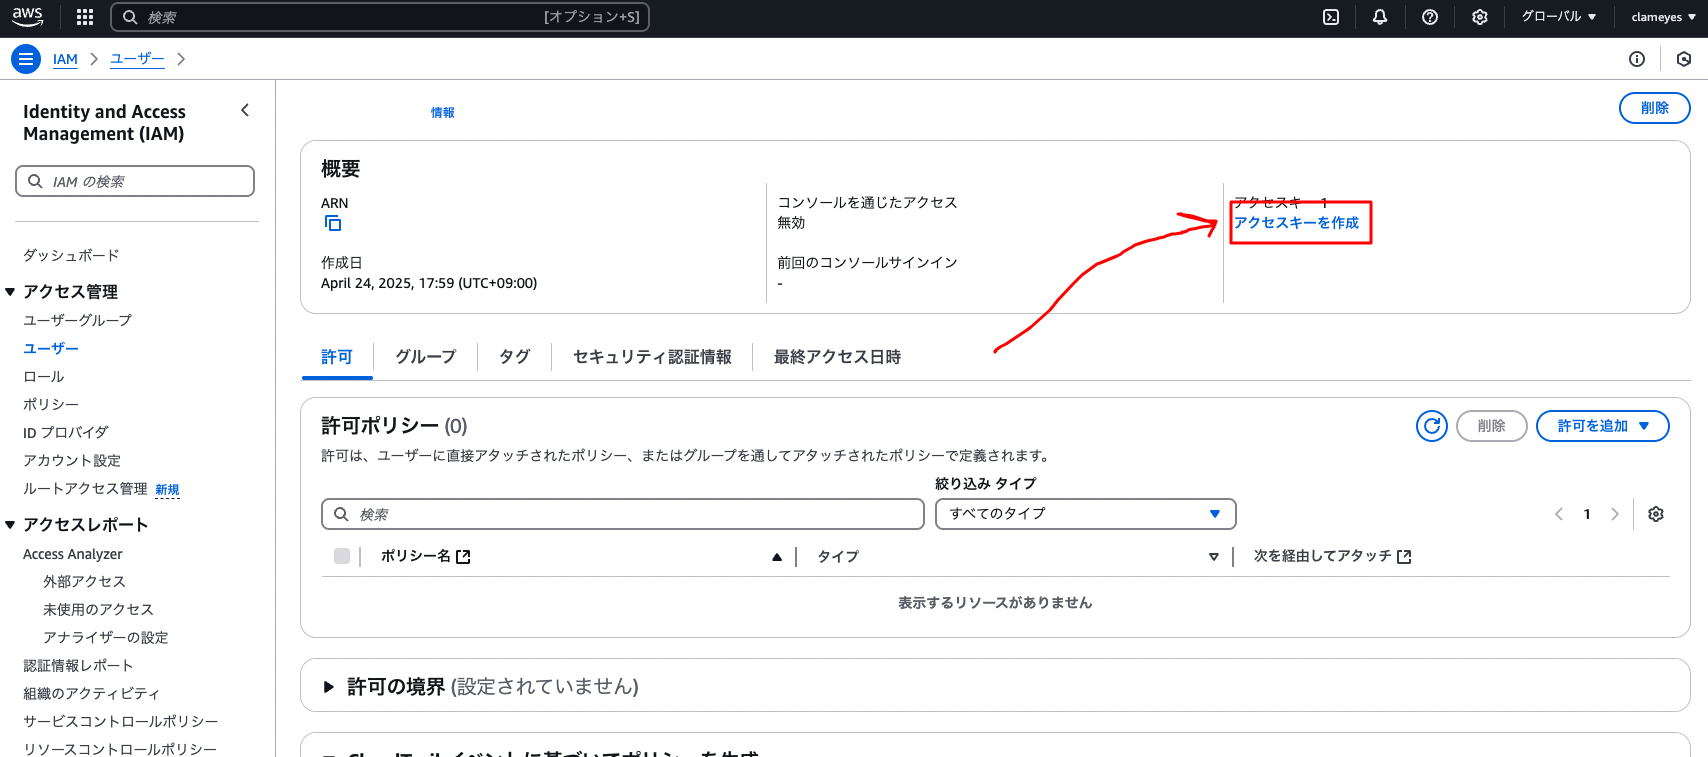
Select the created user and click the “Create access key” button
-
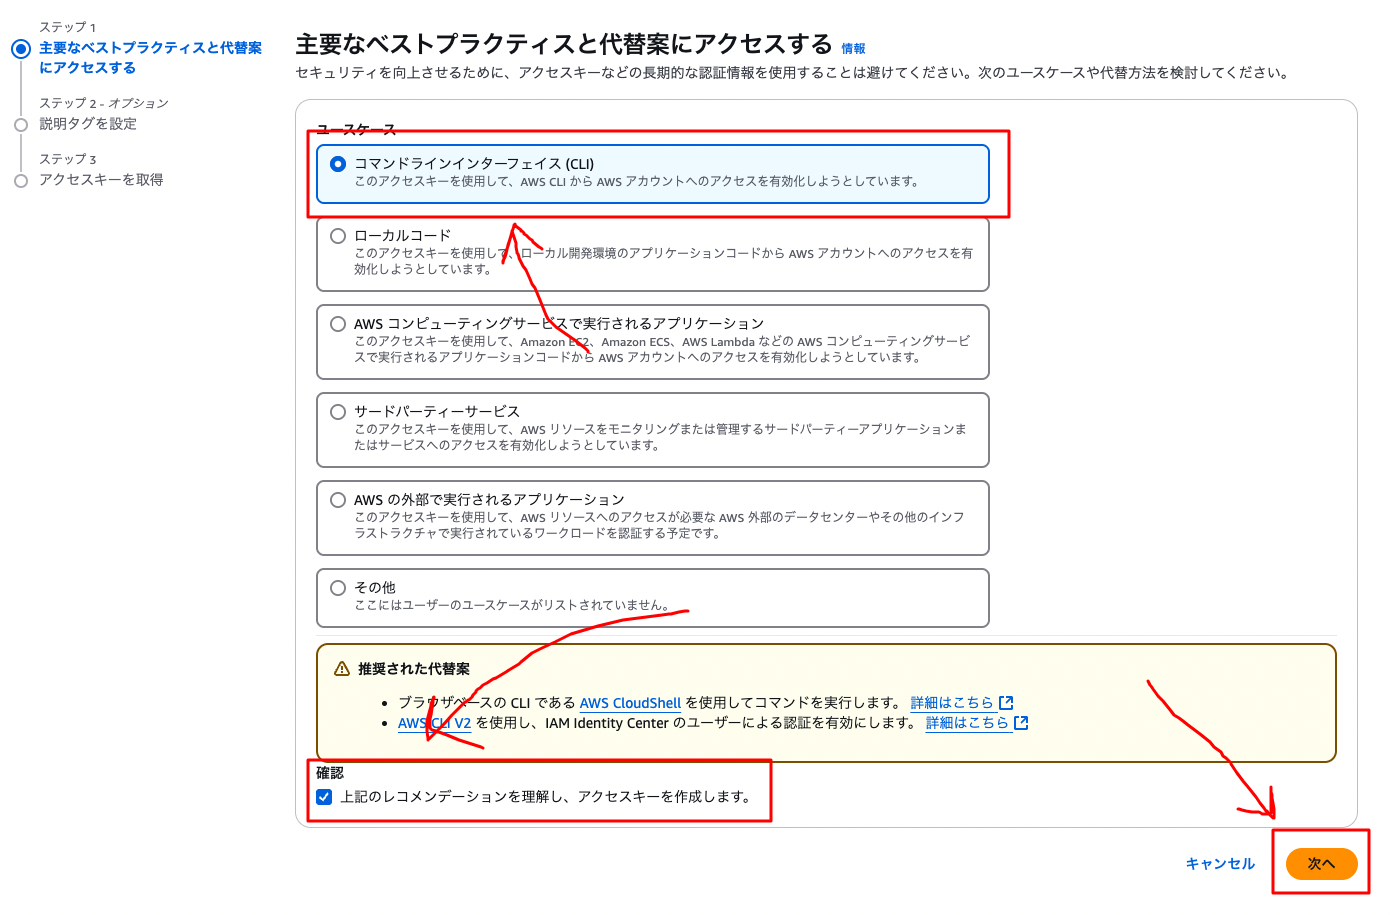
Check “Command Line Interface” and the confirmation checkbox, then click “Next”
-
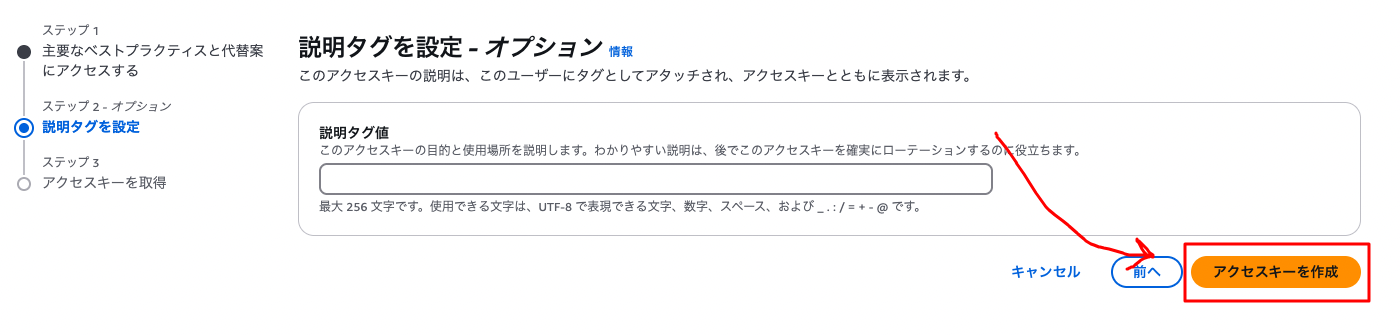
Click the “Create access key” button
-
Copy the “Access key ID” and “Secret access key”

-
Add the values you copied to GitHub Secrets as the following two:
- AWS_ACCESS_KEY
- AWS_SECRET_ACCESS_KEY
Now you have added the secret key to the AWS IAM role.
USER_HOST_NAME
Next, add the username and hostname of the EC2 instance to GitHub Secrets.
-
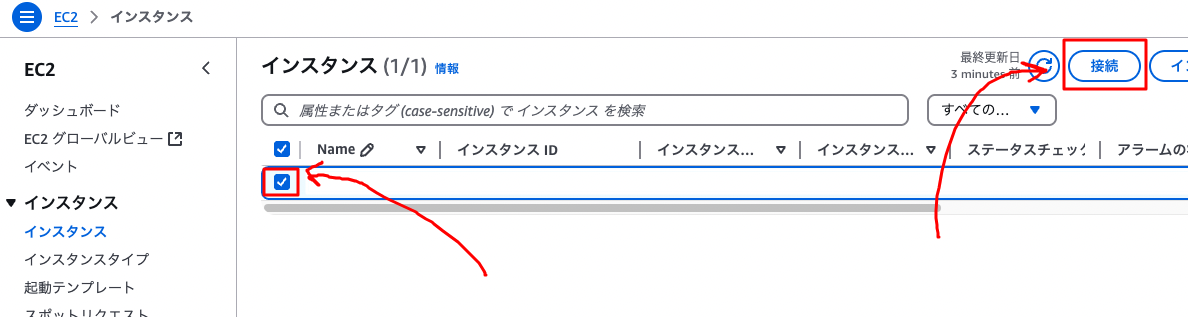
Open the EC2 instance page, check the instance, and click the “Connect” button.
-
Open the “SSH client” tab and copy the part at the bottom where it says “Example:” that combines the username and hostname.

-
Add the copied part to GitHub Secrets with the following name:
- USER_HOST_NAME
Now you have added the username and hostname of the EC2 instance.
PRIVATE_KEY
To SSH connect from GitHub Actions to the EC2 instance, you need to register the private key in GitHub secrets.
You should have created a key for SSH connection when creating the EC2 instance, so use that to enable SSH connection to the EC2 instance.
This assumes you’re using a pem file.
Run the following command to copy the contents of the file:
cat {file path}It’s usually saved in the following location:
cat ~/.ssh/{filename}.pemGet-Content {file path}It’s usually saved in the following location:
Get-Content ~\.ssh\{filename}.pemAdd the copied part to GitHub Secrets with the following name:
- PRIVATE_KEY
EC2_SECURITY_GROUP_ID
Add the security group ID of the EC2 instance to GitHub Secrets.
- EC2_SECURITY_GROUP_ID
Creating GitHub Actions Workflow
Create a .github/workflows/ec2-deploy.yml file in the root directory of the repository and write the following content.
In the case below, it will be executed when pushed to the main branch of the repository.
Replace the part on line 46 that says “repository file path” with the actual path of your repository.
Also, this code assumes starting with docker compose, but change it as needed.
name: Deploy to EC2
on: push: branches: - main
jobs: build: runs-on: ubuntu-latest steps:
# Install IP acquisition library - name: Public IP Install id: ip
# Checkout Branch - name: Checkout uses: actions/checkout@v2
# Install AWS CLI - name: AWS CLI install run: | curl "https://awscli.amazonaws.com/awscli-exe-linux-x86_64.zip" -o "awscliv2.zip" unzip awscliv2.zip sudo ./aws/install --update aws --version
# Set keys for AWS CLI - name: AWS set Credentials uses: aws-actions/configure-aws-credentials@v1 with: aws-access-key-id: ${{ secrets.AWS_ACCESS_KEY }} aws-secret-access-key: ${{ secrets.AWS_SECRET_ACCESS_KEY }} aws-region: ap-northeast-1
# Deploy - name: Deploy run: | # Open security group for SSH aws ec2 authorize-security-group-ingress --group-id ${{ secrets.EC2_SECURITY_GROUP_ID }} --protocol tcp --port 22 --cidr ${{ steps.ip.outputs.ipv4 }}/32 # SSH connect and git pull echo "${{ secrets.PRIVATE_KEY }}" > private_key chmod 600 private_key ssh -oStrictHostKeyChecking=no ${{ secrets.USER_HOST_NAME }} -i private_key "cd repository file path && git fetch --prune && git checkout main && git pull origin main && sudo docker compose down && sudo docker system prune --all --force && sudo docker compose up -d --build" # Close security group for SSH aws ec2 revoke-security-group-ingress --group-id ${{ secrets.EC2_SECURITY_GROUP_ID }} --protocol tcp --port 22 --cidr ${{ steps.ip.outputs.ipv4 }}/32Verification
Once the setup is complete, push changes to the main branch to verify that automatic deployment works properly.
git add .git commit -m "Setup GitHub Actions auto-deploy"git push origin mainYou can check the execution status of the workflow in the “Actions” tab of the GitHub repository.