Skip to content

Blog

Astroを使っていてCould not find Sharp.エラーが出た時の対処法

Astroを使っていて「Could not find Sharp.」というエラーに対処したので備忘録です。

エラーの概要

Astroでビルド時に2種類のエラーが出ました。

このエラーは通常、Astroプロジェクトで画像の最適化を行おうとした際に発生し、Sharpライブラリが見つからないことが原因です。

解決方法

そのままですが、Sharpライブラリが見つからないというエラーなので、Sharpをインストールすることで解決できます。

以下の手順に従って進めてください。

  1. まず、Sharpをプロジェクトにインストールしましょう。

    Terminal window
    pnpm add sharp

  2. astro.config.mjsファイルで、Sharpが正しく設定されているか確認します。

    astro.config.mjs
    import { defineConfig } from 'astro/config';
    export default defineConfig({
    image: {
    service: { entrypoint: 'astro/assets/services/sharp' },
    },
    });
  3. もし上記の手順で解決しない場合は、キャッシュをクリアしてみましょう。

    Terminal window
    pnpm store prune
  4. 最後に、依存関係を再インストールし、プロジェクトを再ビルドします。

    Terminal window
    pnpm install --force
    pnpm build

参考リンク

Cloudflare PagesでNode.jsのバージョンを変更したいとき

Cloudflare Pagesのビルド時にNode.jsのデフォルトバージョンが古くてエラーになることがありました。

Node.jsのバージョンを変更できたので、その方法を備忘録として残します。

デフォルトのNode.jsバージョン

Cloudflare Pagesのガイドによると、デフォルトでNode.js 10が使用されるとされています。ただし、実際のビルドログを確認すると、v12.18.0が使用されているケースもあるようです。これはプロジェクトの設定やランタイムによって異なる可能性があります。

Node.jsバージョンの変更方法

Node.jsのバージョンを変更するには、以下の2つの方法があります。

  1. Cloudflare Pagesの環境変数を使用
  2. ローカルファイルで環境変数を指定

どちらの方法でも、使用したいNode.jsのバージョンを指定することができます。

Cloudflare Pagesの環境変数を使用

  1. Cloudflareダッシュボードにログインします。
  2. 「Workers & Pages」を選択し、該当するPagesプロジェクトを開きます。
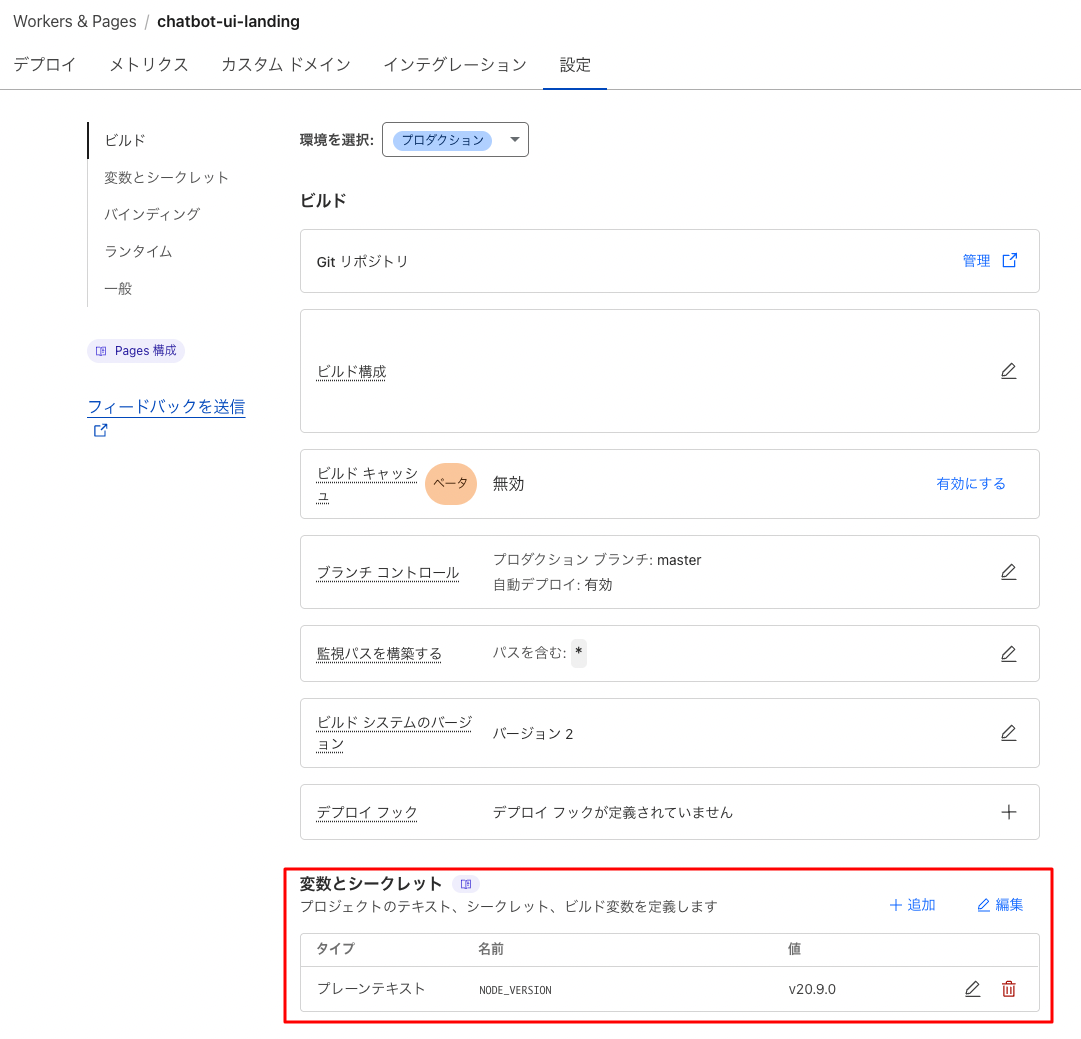
  3. 「設定」→「変数とシークレット」と進み、NODE_VERSIONという名前の変数を追加します。
  4. 値に希望するNode.jsのバージョン(例:20.9.0)を入力します。

Image from Gyazo

ローカルファイルで環境変数を指定

プロジェクトのルートディレクトリに.nvmrcまたは.node-versionファイルを作成し、使用したいNode.jsのバージョンを記述します。

.nvmrc または .node-version
20.9.0

Cloudflare PagesでNode.JS Compatibility Errorが出たとき

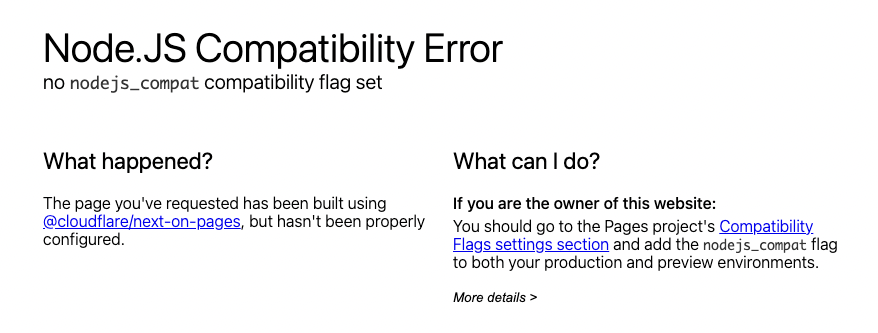
Cloudflare PagesでNext.jsプロジェクトをデプロイする際に、Node.JS Compatibility Errorに遭遇して解決したので備忘録。

Image from Gyazo

エラーの内容

デプロイ後、以下のようなエラーメッセージが表示されることがあります:

このエラーは、Cloudflare PagesプロジェクトでNode.jsの組み込みモジュールにアクセスできないことを示しています。

解決方法

Cloudflareダッシュボードから設定する方法

  1. Cloudflareダッシュボードにログインします。
  2. 「Workers & Pages」を選択し、該当するPagesプロジェクトを開きます。
  3. 「Settings」→「Functions」→「Compatibility Flags」と進みます。
  4. 「nodejs_compat」フラグを追加します。

注意: フラグは nodejs_compat とだけ入力します。引用符やその他の文字は不要です。

wrangler.tomlファイルで設定する方法

プロジェクトのルートディレクトリにある wrangler.toml ファイルに以下の行を追加します:

compatibility_flags = [ "nodejs_compat" ]

重要な注意点

  • Compatibility Flagsを設定した後は、変更を反映させるために再デプロイが必要です。
  • 設定方法によっては、ダッシュボードの「Functions」オプションが見つからない場合があります。その場合は wrangler.toml ファイルでの設定をお試しください。

まとめ

Cloudflare PagesでNode.js Compatibility Errorが発生した場合、nodejs_compat フラグを設定することで解決できます。ダッシュボードまたは wrangler.toml ファイルでこの設定を行い、再デプロイすることでエラーを解消できるはずです。

参考リンク

このエラーに遭遇した際は、ぜひこの方法をお試しください。デプロイの成功をお祈りしています!

Implementing Comment Functionality (Giscus) in Astro Starlight

I’ve implemented a comment feature (Giscus) using GitHub Discussions in Astro’s documentation template Starlight, so I’m leaving this as a record for future reference.

What is Giscus?

Giscus is a commenting system that utilizes GitHub Discussions.

It’s lightweight and uses GitHub authentication, making it excellent for spam prevention.

Prerequisites

  • An Astro Starlight website is set up
  • You have a GitHub account
  • You have a repository with GitHub Discussions enabled

Installation Steps

  1. Install starlight-giscus

    First, install the starlight-giscus plugin. Run the following command in your terminal:

    Terminal window
    pnpm add starlight-giscus

  2. Configure the Giscus app

    Set up Giscus for your repository on the Giscus official site.

    Enter the required information and generate the script code, then copy it.

  3. Update the Astro configuration file

    Open the astro.config.mjs file and add the following configuration:

    astro.config.mjs
    import starlight from '@astrojs/starlight'
    import { defineConfig } from 'astro/config'
    import starlightGiscus from 'starlight-giscus'
    export default defineConfig({
    integrations: [
    starlight({
    plugins: [
    starlightGiscus({
    repo: 'data-repo',
    repoId: 'data-repo-id',
    category: 'data-category',
    categoryId: 'data-category-id'
    })
    ],
    title: 'My Docs',
    }),
    ],
    })

    Replace the values for repo, repoId, category, and categoryId with those generated in your Giscus configuration.

    These four are required fields, but there are other customization options available. Details will be discussed later.

Customization Options

The starlight-giscus plugin has the following customization options:

  • mapping (string): How to map pages to discussions (what the discussion title will be)
    • pathname (default): Page’s pathname
    • URL: Page’s URL
    • <title>: Page’s title
    • og:title: Page’s og:title
  • reactions (boolean): Enable/disable reactions feature
  • inputPosition (string): Position of the reply form
    • bottom (default): Below comments
    • top: Above comments
  • theme (string): Theme for the comment section
  • lazy (boolean): Enable/disable lazy loading

You can use these options to customize the comment functionality to suit your site.

Disabling Comments on Specific Pages

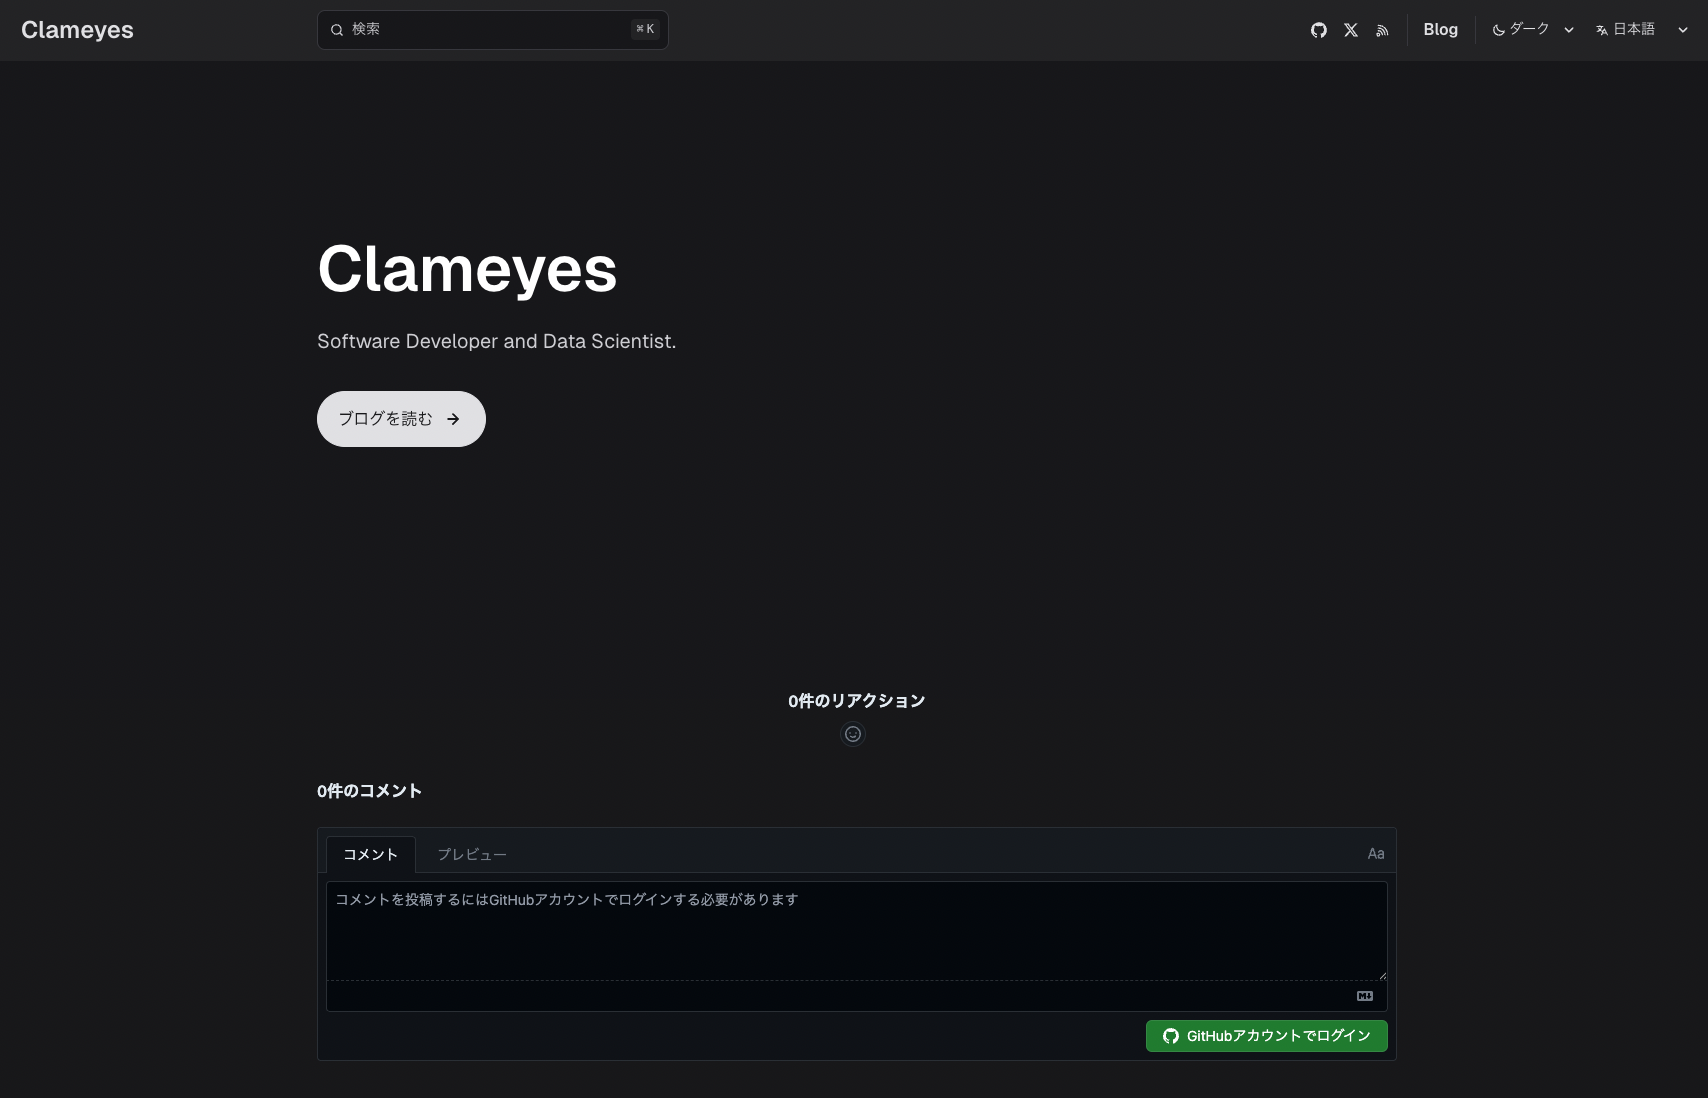
By default, comments will appear on pages where they might not be necessary, such as the top page, as shown below.

Image from Gyazo

If you have pages where you don’t want comments to appear, you can control this using frontmatter.

Configuration Steps

  1. Extend the schema in the src/content.config.ts file

    src/content.config.ts
    import { defineCollection, z } from 'astro:content'
    import { docsLoader } from '@astrojs/starlight/loaders'
    import { docsSchema } from '@astrojs/starlight/schema'
    export const collections = {
    docs: defineCollection({
    loader: docsLoader(),
    schema: docsSchema({
    extend: z.object({
    giscus: z.boolean().optional().default(true),
    }),
    }),
    }),
    }
  2. Add giscus: false to the frontmatter of pages where you want to disable comments.

    ---
    title: Page without comments
    giscus: false
    ---

If Using the starlight-blog Plugin

If you’re using the starlight-blog plugin, call blogSchema(context) within the extend function, then add giscus.

Also, set the default to false if you want to disable giscus on blog pages and tag pages.

Configuration Steps

  1. Extend the schema in the src/content.config.ts file

    src/content.config.ts
    import { defineCollection, z } from 'astro:content'
    import { docsLoader } from '@astrojs/starlight/loaders'
    import { docsSchema } from '@astrojs/starlight/schema'
    import { blogSchema } from 'starlight-blog/schema';
    export const collections = {
    docs: defineCollection({
    loader: docsLoader(),
    schema: docsSchema({
    extend: (context) => blogSchema(context).extend({
    giscus: z.boolean().optional().default(false)
    })
    }),
    }),
    }
  2. Add giscus: true to the frontmatter of pages where you want to enable comments.

    ---
    title: Page with comments
    date: 2025-03-17
    giscus: true
    ---